

Are you a student or teacher that needs help navigating within the student account? How about completing self-assessment, setting goals, and creating portfolios? This article will provide you with an overview of the student account to help you make the most of student learning. You can also check out our Getting Started Guide for Students for more information.
Overview
When you first log into your student account, you will be brought to the main Dashboard page. If you're a teacher, you can access a demo version of the student account by clicking Student View at the top right of the page.
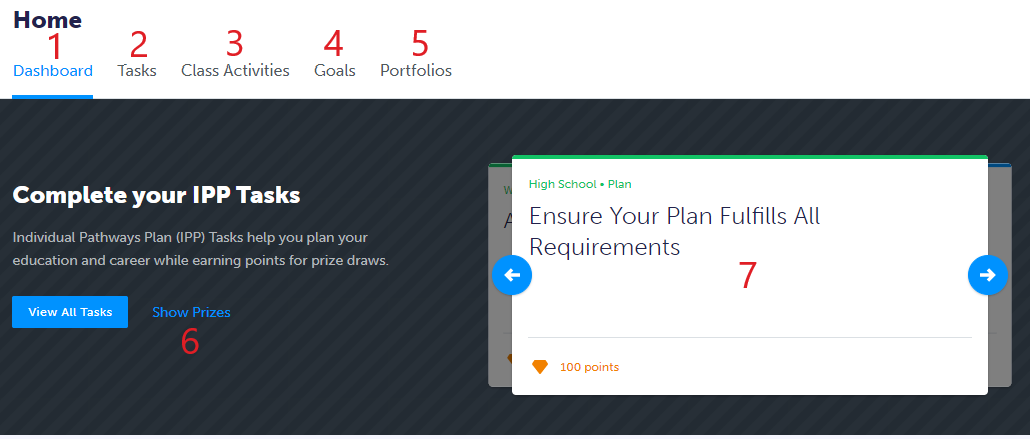
- Dashboard
- The first page you'll see when you log in, and the entry point to access other features in your account
- Tasks
- Access to the IPP: Individual Pathways Plan (or Education Pathways Plan, EPP, in Alberta and Northwest Territories).
- Tasks are grade-specific suggestions for students to complete in their accounts, fulfilling a wide range of career and education planning objectives.
- Example IPP tasks include:
- Creating Goals
- Adding to a Resume or Cover Letter
- Adding to a Portfolio
- Planning High School courses
- IPP Tasks are associated with points, which students can use to enter prize draws!
- Note: tasks always reset at the end of every school year, so at the start of the new year all students will be at 0% completion
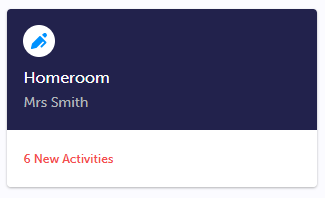
- Class Activities
- Where all teacher-created activities appear for students
- Each class a student is added to will have an associated Class Activities box (see screenshot below)
- Students can begin to complete Class Activities and add their work to a portfolio by clicking on the Class box
- Goals
- Where students can set individualized SMART goals. Each goal has associated sub-tasks which act as a progress marker that students can check off (see screenshot below)
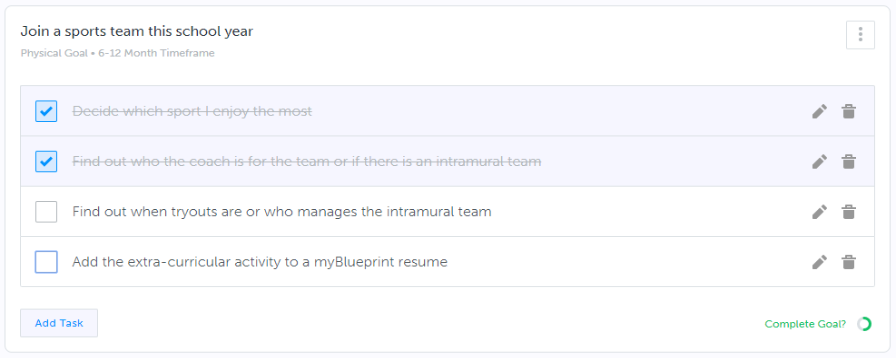
- Pro Tip: goals can be added to portfolios by clicking the 3 grey dots in the top right of any goal
- Pro Tip: You can read more about Goal setting and how to set S.M.A.R.T. goals in the Guide section of your account
- Note: previous school year goals will not count towards the completion of current year IPP tasks
- Where students can set individualized SMART goals. Each goal has associated sub-tasks which act as a progress marker that students can check off (see screenshot below)
- Portfolios
- Where students can create digital portfolios to document their learning
- Show Prizes
- Provides a list of all myBlueprint prizes and any created school district or school-specific prizes
- Students can check out the scholarship tab for more information on available scholarships.
- Students can enter prizes as many times as they want, provided they have the minimum entry points
- Note: students gain points as they complete work in their account (i.e. adding goals, multiple portfolio boxes, creating a budget etc.)
Also within a student account is the Navigation Menu, which is accessible from the left-hand side of the account.
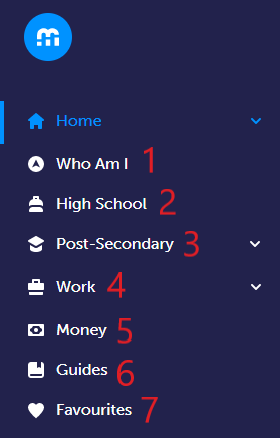
- Who Am I
- Where students can complete 5 interconnected surveys and occupation-specific compatibility surveys to learn more about who they are and potential future careers
- To find out more about the theories & frameworks that Who am I is based on, take a look at this article!
- Note: surveys can be re-done and survey results can be added to portfolios (see screenshot below)
- Note: surveys can be re-done and survey results can be added to portfolios (see screenshot below)
- High School
- Where students can see their high school plan, monitor their progress towards graduation, explore various post-graduation pathways and track their community involvement hours
- Note: to unlock the Pathway Eligibility, students must add courses to their plan
- For more information, check out our Student Account Troubleshooting Tips article
- Where students can see their high school plan, monitor their progress towards graduation, explore various post-graduation pathways and track their community involvement hours
- Post-Secondary
- Provides access to over 15,000 programs and opportunities across 3 pathways:
- Apprenticeship
- College & University
- Workplace
- Students can explore the various opportunities available to them depending on their chosen post-secondary path by using the search field and filters
- Students can also compare 2-3 programs side-by-side to help them chose the program that would most suit them
- Provides access to over 15,000 programs and opportunities across 3 pathways:
- Work
- Includes the following:
- Occupations
- Students can search for occupations and narrow their search using the available filters amongst a list of over 600 occupations listed
- Resumes
- Where students can use the built-in Resume feature (by clicking + Create Resume)
- Cover Letters
- Where students can use the built-in Cover Letter feature (by clicking + Add Cover Letter)
- Job Search
- Provides access to thousands of current jobs, internships and volunteer positions
- Occupations
- Includes the following:
- Money
- Where students can learn more about budgeting and finance (by clicking the Budget and Finance guide)
- Students can also create their own budgets (by clicking + Add Budget)
- Guides
- Provides access to many guides, including information about post-secondary options, financial planning, mental health, 9searching for jobs etc.
- Favourites
- Where students can create a list of favourite occupations, institutions, programs, workplaces, job searches etc.
Main Features
Setting up the high school plan:
- Clicking on any + Course will bring students into all disciplines and related courses offered at their school
- Clicking + [course discipline name] will bring students into that specific discipline, i.e. + English
- Note: course boxes with a discipline name are not required to be filled by a course in that discipline, i.e. in a + English box, any course can be added to that box (see screenshot below)

- Note: course boxes with a discipline name are not required to be filled by a course in that discipline, i.e. in a + English box, any course can be added to that box (see screenshot below)
- Clicking on View Plans will allow students to create a new plan:
- Click the 3 grey dots on any plan
- Click Create Plan
- Unless the student has a Default plan, in which case they can only copy the plan
- + Add New Plan
- As students populate their high school plans the Graduation Indicator and Pathway Eligibilitywill update accordingly
- Note: to unlock the Pathway Eligibility, students must add courses to their plan
- *For more information check out our, Student Account Troubleshooting Tips article
- Note: to unlock the Pathway Eligibility, students must add courses to their plan
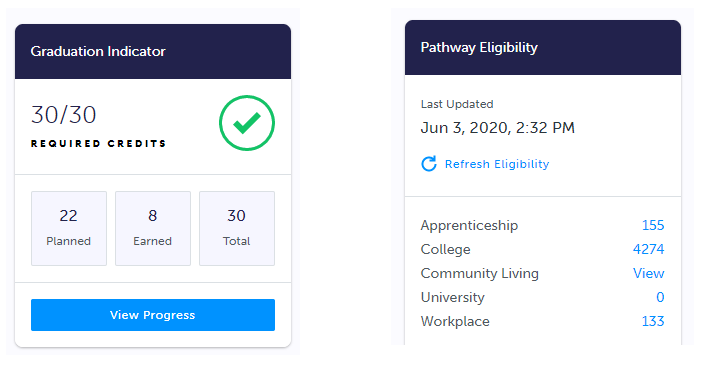
The Graduation Indicator:
- Clicking on View Progress brings up a panel that shows students what credits they have planned, earned, and what credits they have yet to earn based on their provincial graduation requirements
- Students can click Options to do the following:
- Substitute Course
- If they need to substitute Compulsory or Elective courses with another course to meet the requirement
- Change Graduation Requirements
- If they need to update their Provincial high school diploma or certificate type
- Note: changing the diploma or certificate type will also update the graduation credits requirement
- If they need to update their Provincial high school diploma or certificate type
- Substitute Course
The Pathway Eligibility:
- Students first need to add courses into their high school plans to unlock the various pathways
- Note: not all pathways unlock at the same time
- Apprenticeship and Workplace pathways typically unlock with fewer courses populated in the plan
- College and University pathways unlock based on a couple of factors:
- Post-secondary institutions program requirements
- Students Provincial high school graduation requirements
The Who Am I Surveys are designed to engage students to learn more about themselves. Students' results are then used as a basis to guide them toward various post-secondary and occupation pathways that would best suit them. There are 5 core surveys students can complete (Learning Styles, Personality, Interests, Knowledge, and Motivations). Upon completion of these surveys, students can click View Report to read more about their survey results.
Note: to learn more about the 5 survey types, please refer to our Who Am I - Theories and Frameworks article.
Once students have completed all 5 surveys, they'll unlock Occupation Matches for careers that might interest them. From there, they can do any or all of the following:
- Upload the results to a Portfolio they have created (see screenshot below)
- Re-do any of the surveys as many times as they choose (click the circular arrow button)
- Try the Compatibility Survey to see how they match up with specific occupations
- Save any occupation as a favourite by clicking the grey heart
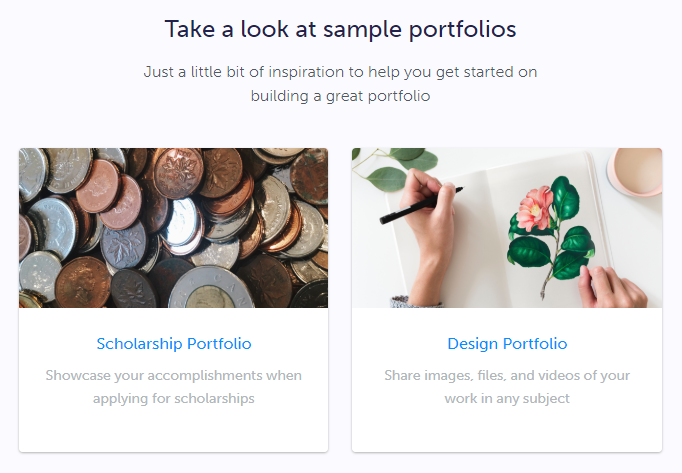
Portfolios are at the heart of students' learning on myBlueprint. They are the way that students can document their individual journey and reflect on their growth throughout their time in school and beyond. Here are a few examples of portfolios that can help students get started.
Students can set up as many customizable portfolios as they want with the following steps:
- Click Portfolios
- Click + Add Portfolio
- Click + Add Box
Portfolios can also have a personalized avatar/picture and banner:
- In the Portfolio, Click Choose Avatar
- Click Update Banner

Looking for a way to organize and filter the portfolio?
- Click Filters

- Select the Media type you want to organize
- Note: you can select multiple media at the same time
- Click to Close filters
- On all of the filtered portfolio boxes
- Click the 3 grey lines (top right of each box)

- Click Tags
- Click Add Tags
- Click the 3 grey lines (top right of each box)
- Once all tags have been added, repeat for all media types in your portfolio
- To easily find portfolio boxes simply,
- Click Filters
- Select the Media type
- Click the relevant tag(s)
- To see all portfolio boxes once again,
- Under Filters, click Clear All
Have you completed a portfolio and want to show off your hard work? You can present and share your portfolio using the Slideshow and Share features. 
- To Present:
- Click Slideshow (top right)
- If needed update the Slideshow Mode
- Click Play
- To share:
- Click Share (top right)
- Click Generate Link
- Click either Copy Link or,
- The Message/Envelope icon
Need some inspiration to create an awesome portfolio? We have you covered!
- Take a look at some example completed portfolios, easily accessible from within your account
- Also accessible from our Support Centre - look for 'Exemplar Portfolio'
Are you more of a visual learner? You can also check out our Support Centre, where you will find videos to walk you through the features of the student account. You can also access live webinars from our Support page.