

This article will provide you a high-level overview of your course selection checklist. The Checklist is built right in to the Dashboard of your Counsellor Lead account to help guide you through preparing for and completing course selection.
Overview
In your Counsellor Lead account, on your Dashboard page, you will see a Course Selection box. Within this box you will see a Checklist with the following items:
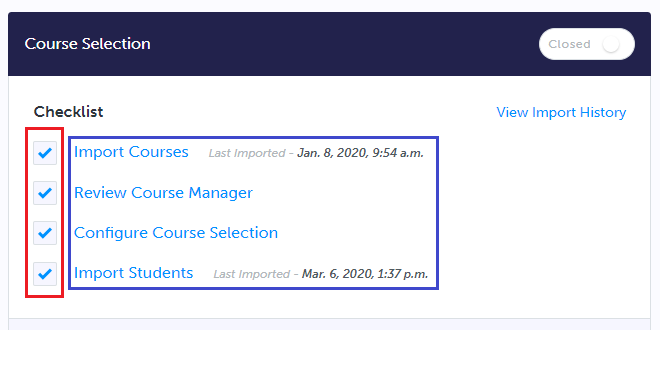 Note: the boxes with the check marks cannot be checked off manually. These boxes will automatically check off, once you click into one of the checklist items, then make and save changes.
If you see the following in your Counsellor Lead account:
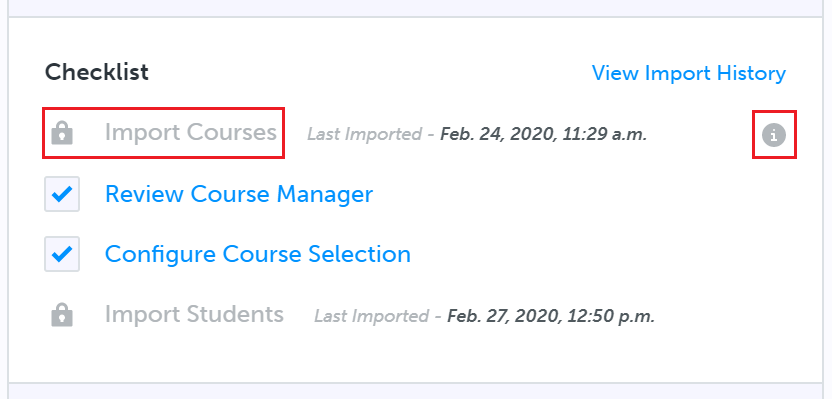
This means that importing course and/or student data can only be done at the board/district level, as signified by the locks. You can see the last imported date to the right. If you require new data to be imported, or wish to confirm when the next import is scheduled, please reach out to your board IT. You can also click the small grey 'i' icon to learn more.
Import Courses
When you click on Import Courses you will be brought to a page that will have one of the following options to run course imports:
- Districts and schools that store data in Student Information Systems (SIS) which export data in text format, such as Trillium or Aspen, will have an interface that looks like this:

Note: the required files come directly from your SIS, and the file names will vary depending on your SIS. For Trillium SIS, Page 1 of this guide details the steps to generate the required files using Trillium Interfaces. For additional support with your SIS, reach out to your SIS help desk or your district lead for myBlueprint.
Don't see your course(s) after the import? See 'Troubleshooting' below for more details.
- Districts and schools that store data in Student Information Systems which connect through an API, such as Maplewood or PowerSchool SIS, will have an interface that looks like the below,
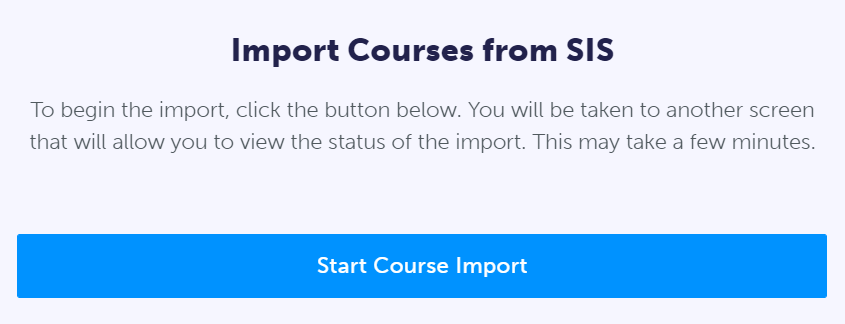
Note: once you click Start Course Import, the import will automatically run and you will be notified that it is in progress. Once you see the green check mark in the top right of your screen you can navigate out of the course import page. Refresh your Dashboard page and you will see the newly imported courses within the Courses section.
Troubleshooting
Regardless of the method used to import courses, if you do not see your courses, it could mean the following:
- The course is not added to next year's course scheduling in your SIS
- Reach out to your admin or SIS staff to ensure the courses are added into next year's course scheduling, and that you export courses from next year
- If they are already added into next year's scheduling:
- For boards using Trillium or other text file-based exports, ensure that the course information was extracted from next year
- Check in the Courses section under Disabled courses to verify if the course is already in myBlueprint, but disabled
- Still can't find your course? Reach out to myBlueprint Support
Review Course Manager
Clicking on these words will lead to your Courses page, where you can complete the following actions,
- Enable courses
- *Meaning the courses are currently disabled
- Under the Disabled Courses tab click on the 3 grey dots to the right of the course
- Click Enable Course
- *Meaning the courses are currently disabled
- Disable courses
- *Meaning the courses are currently enabled
- Under the Enabled Courses tab click on the 3 grey dots to the right of the course
- Click Disable Course
- *Meaning the courses are currently enabled
- Edit courses
- One of two ways:
- Click on the 3 grey dots to the right of the course, then Edit Course
- Click on the blue course code
- One of two ways:
Note: course codes cannot be updated in myBlueprint for schools who import courses from a Student Information System (SIS). They must be updated in the SIS.
- Add Course or Package
- Click on the grey icon to the right of the word Courses, see screenshot below.

2. Click Add Package
Please note,
- All packages must have 2 courses
- Once the package is created, the two courses that make up the package should be disabled if you don't want students to select those individual courses
- Packages set up in myBlueprint should typically be set up in your SIS as well (i.e., if the package has a course code of 'CIVCAR' in myBlueprint, a corresponding package with the same code should be created in your SIS)
- Note: this may not be required depending on the export configuration for your school board. To confirm, please contact myBlueprint Support
Configure Course Selection
When you click on Configure Course Selection you will be brought to a Course Selection tab where you can make changes to such features as the credit limit, required courses, submission settings etc. A few key settings to note are as follows,
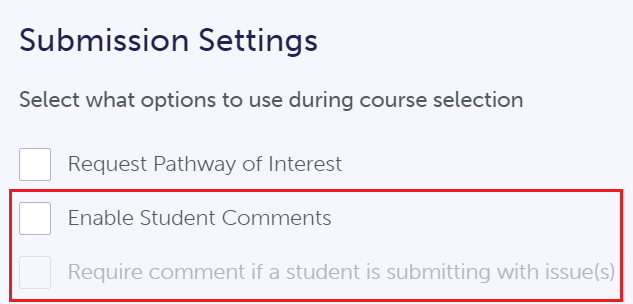
- Submission Settings
Note: to enable the setting, "Require comment if a student is submitting with issue(s)", the setting, "Enable Student Comments" must first be checked off.
2. Approval Settings
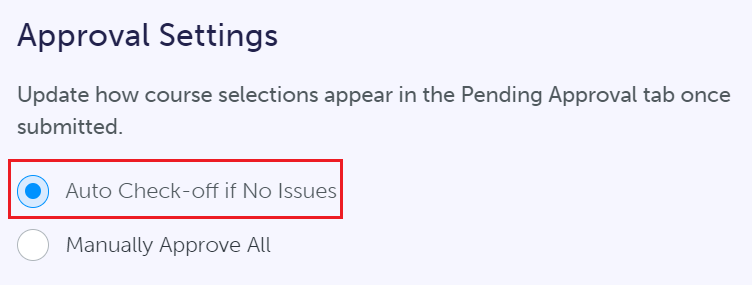
Note: the default setting is "Auto Check-off if No Issues". This means all students who submit course selections and have no issues in their plan (e.g. missing prerequisite, etc.) will automatically be checked off in the Pending Approval tab, and ready to be approved and moved into 'pending export' status with one click of the Approve Plans button.
To see what this looks like in the Students Pending Approval tab, take a look at the screenshot below,
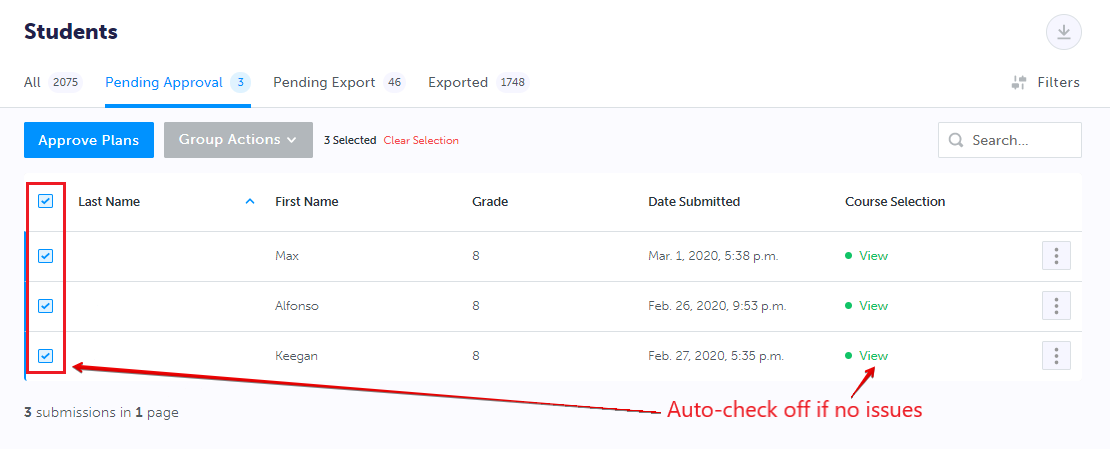
You can see the 3 students do not have any issues with their Course Selection submissions, as such, once they submit their course selections, they automatically check off.
- Because this setting auto checks off, students can be checked off on multiple pages. This is important because if you click into Pending Approval, and wanted to make changes using the Group Actions menu, you must ensure no other students are selected.
- This means you either approve all plans that are auto-checked off first
OR
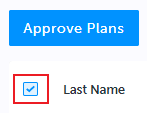
- Deselect all students by checking off the top most box to the left of Last Name, then Select All, followed by Clear Selection.
- Once deselected, you can make changes for other students
![]() Note: If you do not see "[x] Selected," "Clear Selection" and/or the Approve Plans button is greyed out, that means there are no students with plans checked off.
Note: If you do not see "[x] Selected," "Clear Selection" and/or the Approve Plans button is greyed out, that means there are no students with plans checked off.
Import Students
Student imports are generally automated, meaning that you do not have to run them manually because we receive student data according to a schedule. However, if you have newly added students and want to run an import, you can click on Import Students. (If the option is locked, that means imports can only be run centrally by your board IT.) If the option is available, clicking it will bring you to a page with one of the following options to run student imports:
- Districts and schools using Student Information Systems which export data in text format, such as Trillium or Aspen, will have an interface that looks like the screenshot below,
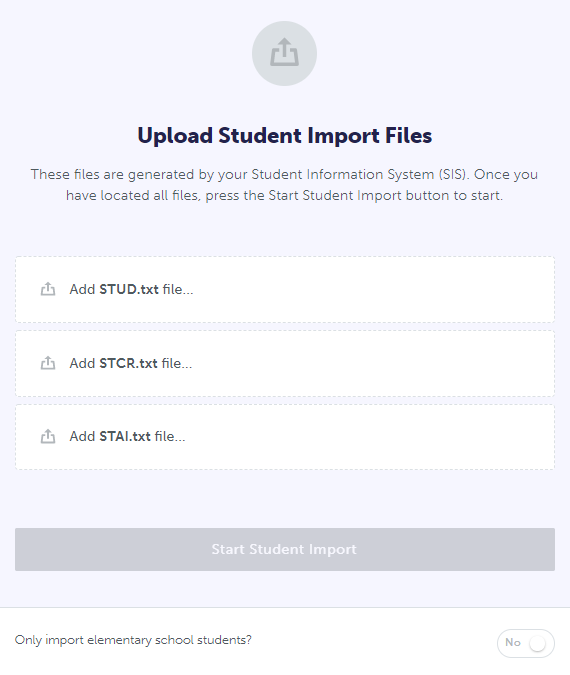
Note: the STUD, STCR and STAI files come directly from your SIS. If you do not know how to extract the files from your SIS, reach out to your SIS help desk or your district lead.
*Don't see your student(s) after the import? See 'Troubleshooting' below for more details.
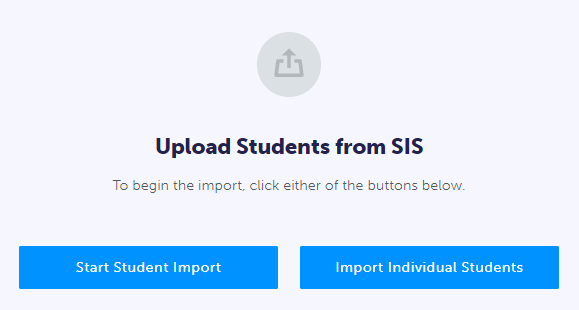
- Districts and schools that store data in Student Information Systems which connect through an API, such as Maplewood or PowerSchool SIS, will have an interface that looks like the screenshot below.
- Clicking Start Student Import will trigger a new import for all active students at your school - this is best if you have many new students you want to bring over
- Clicking Import Individual Students will load the list of students from your SIS, and allow you to check off individual students you wish to import - best if you have just a few newly added students
Note: once you click Start Student Import or select Individual Students to import, the import will automatically run and you will be notified that it is in progress. Once you see the green check mark in the top right of your screen you can navigate out of the student import page. Refresh your Dashboard page and you should see your total number of students increase.
Troubleshooting
Regardless of the method used to import students, if you do not see your students, it could mean the following,
- The student is not set as currently active and active for next year in your SIS, meaning they will not come over on the import
- Reach out to your admin staff or SIS team to ensure they are active at your school, with a provincial student number on file
- If they are confirmed as currently active and active for next year
- Reach out to myBlueprint Support for further troubleshooting
Now that you have a better understanding of your Checklist, you may be looking for more detailed resources for successful Course Selection. Visit our Support Page to access our Preparing for Course Selection and Completing Course Selection resources - these contain a detailed walkthrough of all Course Selection settings and steps.
Still need help? Reach out to us at, support@myblueprint.ca or call us at, 1-888-901-5505.